This article covers the basic steps on how to create a virtual tour inTogotiki.com. 360 images are the primary files that you will be connecting to create a virtual tour. You can use other file types (360 videos, Videos, and Photos) within a virtual tour for hotspots or picture-in-picture videos. We will discuss those more advanced features in another article. This article will focus on using 360 images and teach you how to create a virtual tour.
The basic steps to create a virtual tour are as follows:
Load your content (360 images….) intoFile Library and allow it to web optimize and for the system to analyze it.
Publish your tour on Togotiki or embed it onto your website.
Prerequisite: After you have loaded the files (File Library) you intend to use in the virtual tour, you will want to create a Scene for each 360 image that you want as a point within your tour. The instructions below assume you have already loaded your files and they have completed processing.
Go to Scene Manager
Select "Add Scene" in the upper right
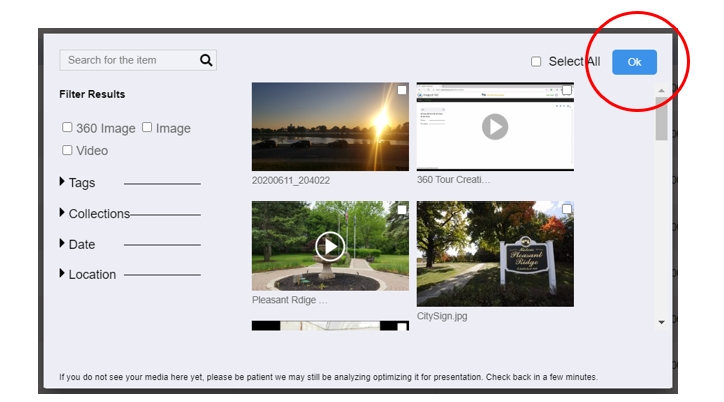
You can either create Scenes one at a time or create multiple Scenes at one time. Select the 360 image file(s) you want to use to create your Scene(s). You can use the filters and search functions to help find the correct files. After you have selected the file(s) click OK. If you don’t see your files in the Media Chooser, they are still getting optimized and may take up to 5 minutes to appear.
Note: The system will use the File Title from the selected media to automatically create your Scene Title. You can change your Scene Title and Description later. We highly recommend you have File Titles and Descriptions that are user friendly prior to creating Scenes.
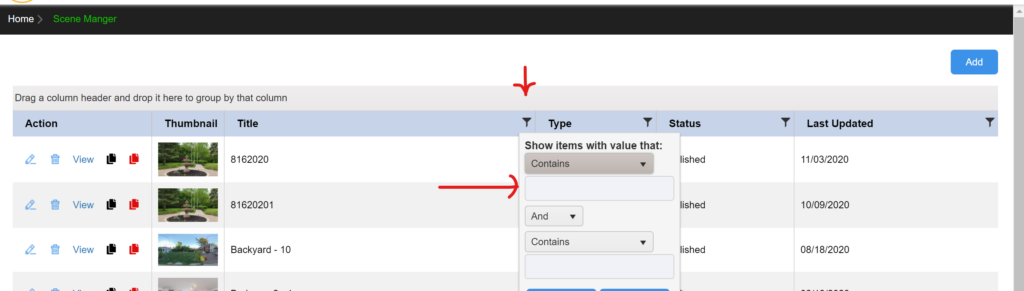
The System will automatically create your Scene(s). They can be found on the Scene Manager grid. All of the grids in Togotiki can be used to filter and sort information to help you easily find your content.
You can start creating your virtual tour at any point in the tour line-up (route of your tour). But it is best to begin where you think you would generally want your visitor to begin. Once your tour is created you can use any point (360 Image Scene) as the beginning or allow visitors to choose where they start their tour.
Adding Content to your Virtual Tour
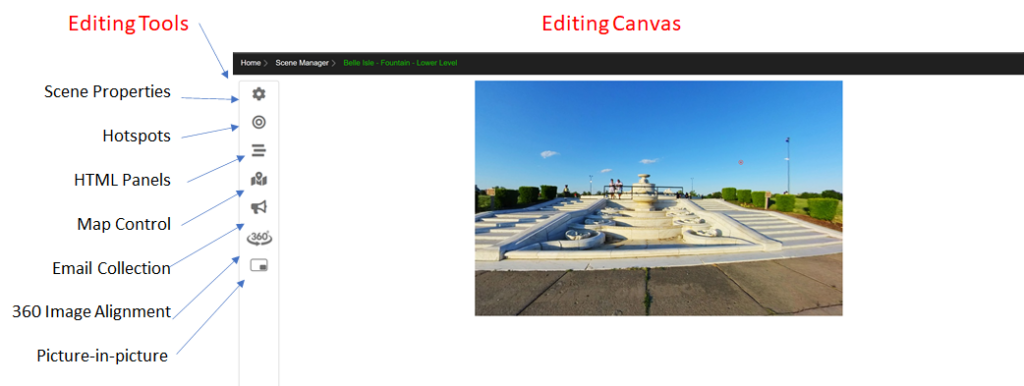
Select the first Scene you want to work with on the gird. In the Action column you will see the option to edit the Scene. Place the Scene in Edit mode.
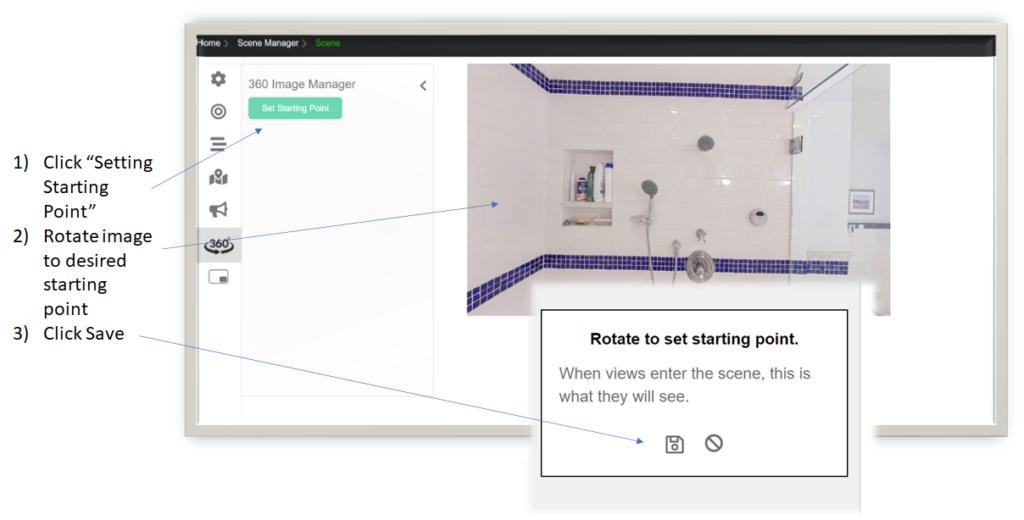
For any 360 Image Scene you should set the 360 Image Alignment. This will tell the system where the image should be pointing when the Scene is opened. It is easy to do, just rotate the 360 image horizontally to the position you want your viewers to see first.
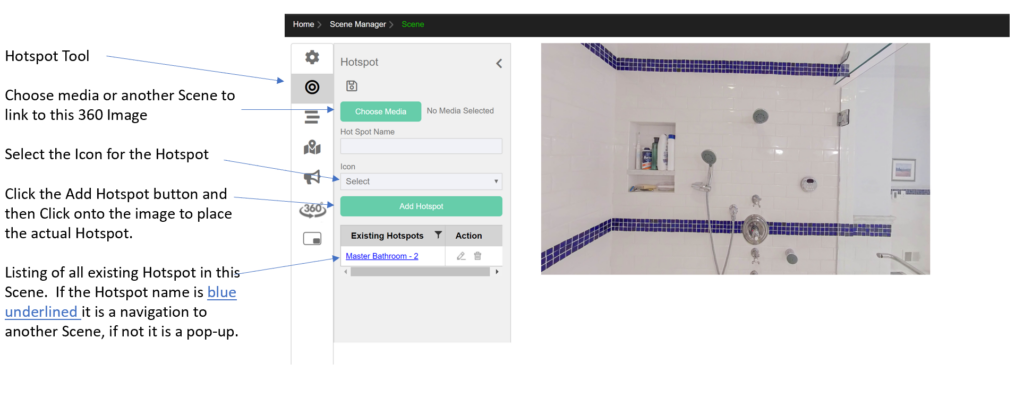
Now you are ready to connect this 360 Scene with other 360 Scene to provide your virtual tour navigation. You will be using the Hotspot tool to set-up the navigation. The Hotspot tool can also be used to create pop-up content in a 360 Image. When you want to create navigation you must select a Scene that you have created above.
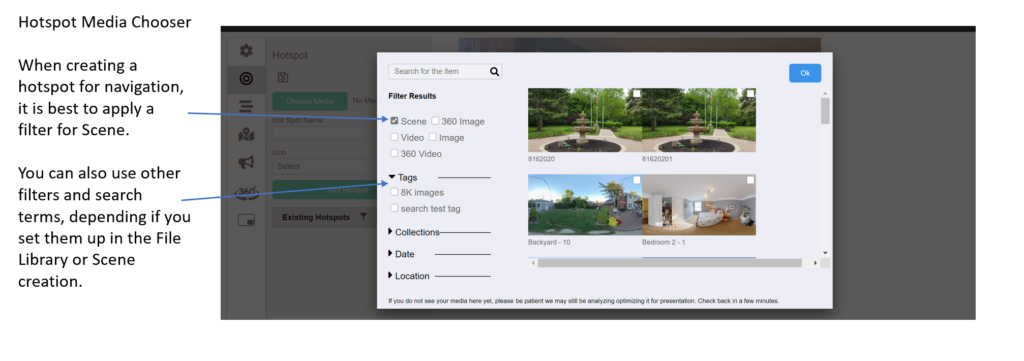
The Choose Media tool includes both Scenes and media in the File Library. You can apply filters and use search to help find the right Scene. You will find it easiest to filter for Scenes. Check the box in the upper right corner of the item you want to use and hit “OK”
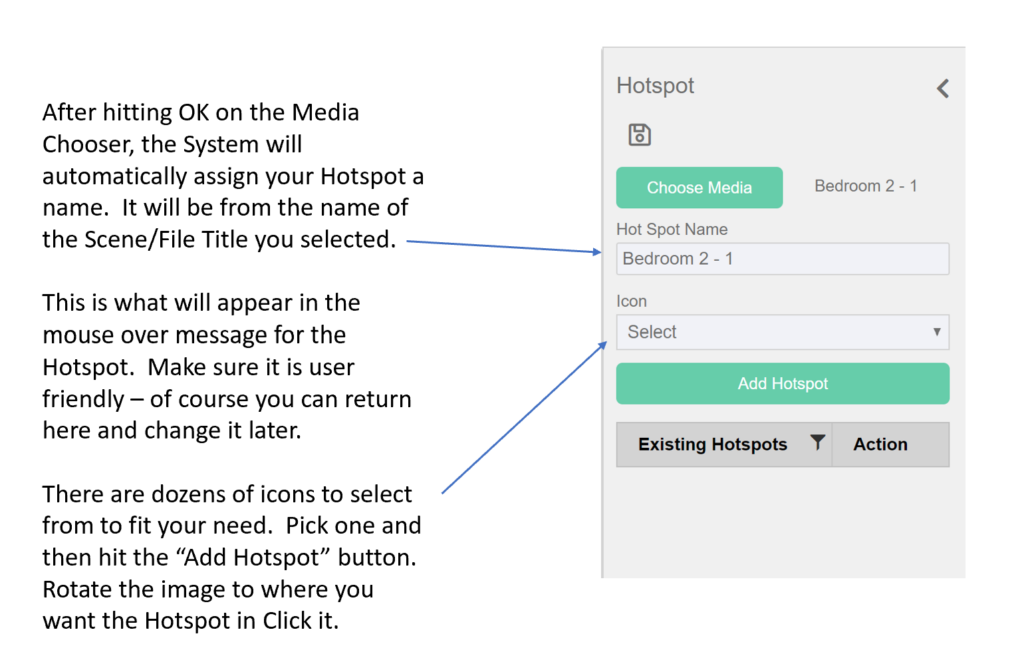
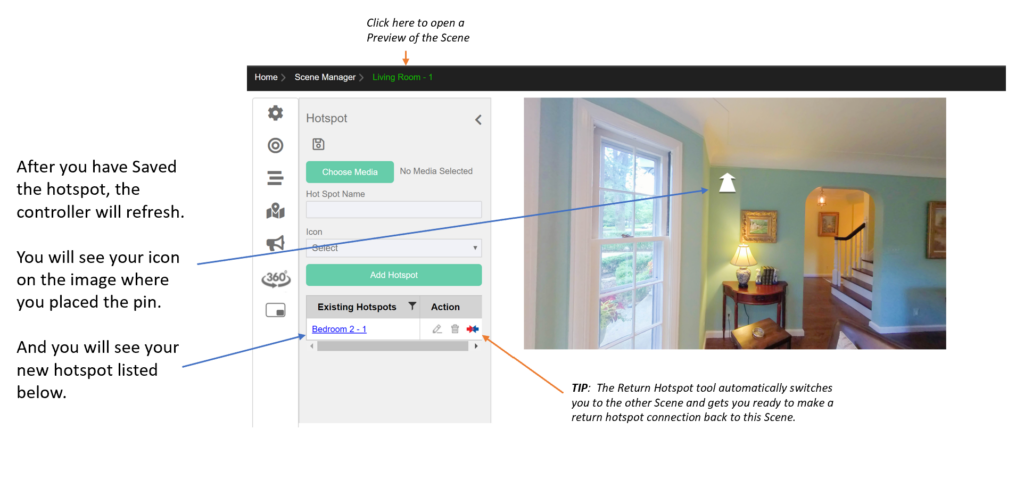
After picking the Scene above and hitting OK, you will be returned to the Hotspot control. Make you sure you are happy with the hotspot name and then select the Icon and place the hotpot into your Scene.
After selecting the icon hit the “Add Hotspot” button. You can rotate the image to the position where you want to place the hotspot. Then click it to place the pin.
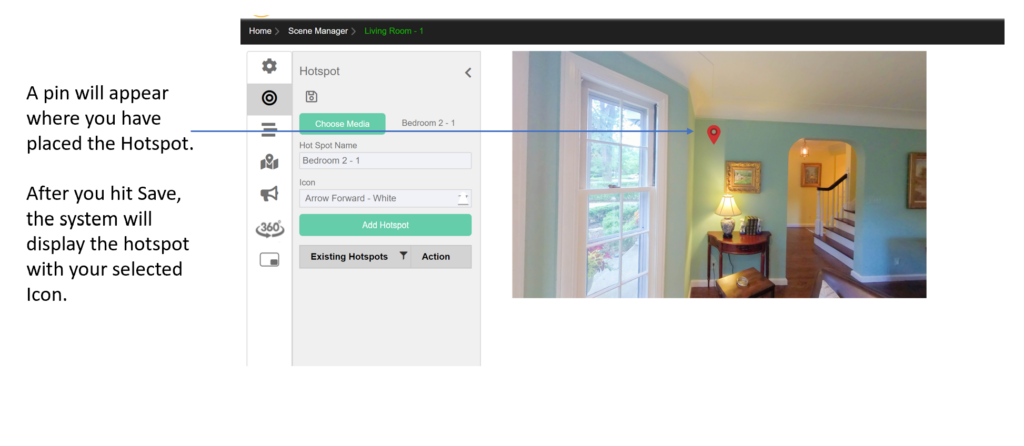
After hitting Save the screen will refresh and you will see your hotspot icon in the image. You can then proceed to add more hotspots into this Scene or create a return hotspot if you want your viewers to be able to move back and forth.
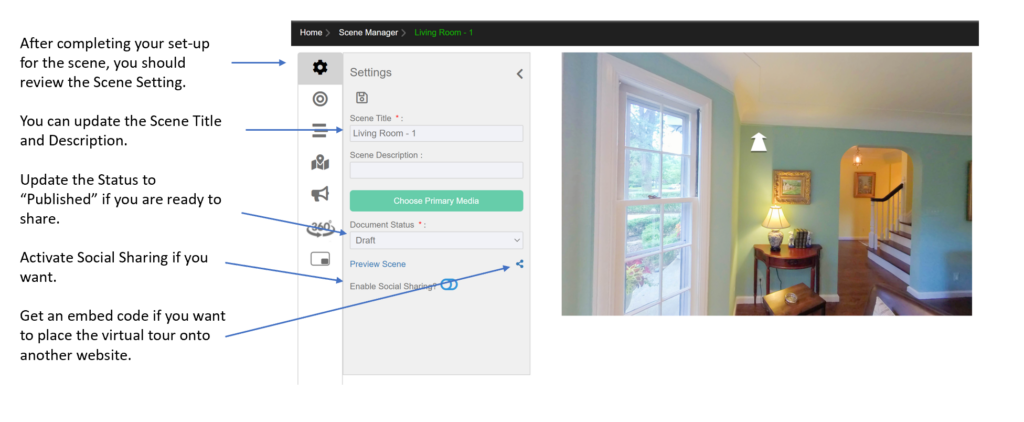
Once you have finished setting up the Scene, go to the Setting and confirm final details. You are ready to Publish and Share your Virtual Tour!
You have 3 basic options for sharing your Virtual Tour.
1) get an embed code and install on your own website
2) Place the virtual tour scene(s) onto your Togotiki Landing page.
3) Share either the branded or unbranded URL link to the tour.
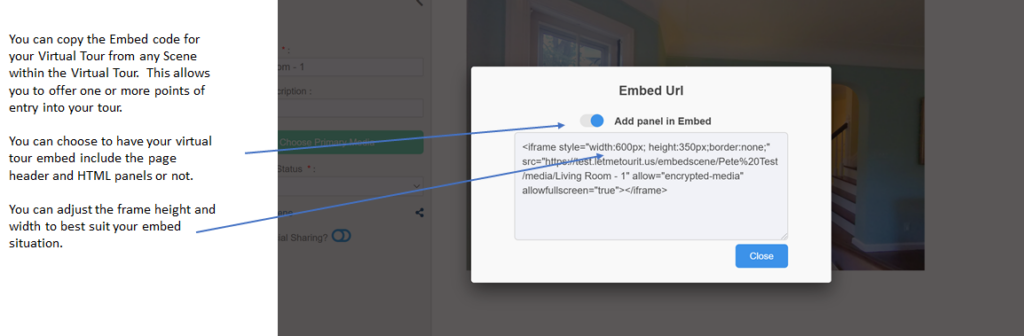
Sharing your virtual tour with an Embed Code To get an Embed code you simply click on the Share icon and a pop-up appears. The pop-up will default to include your page header and the your HTML panels (if any). You can adjust this with the toggle at the top.
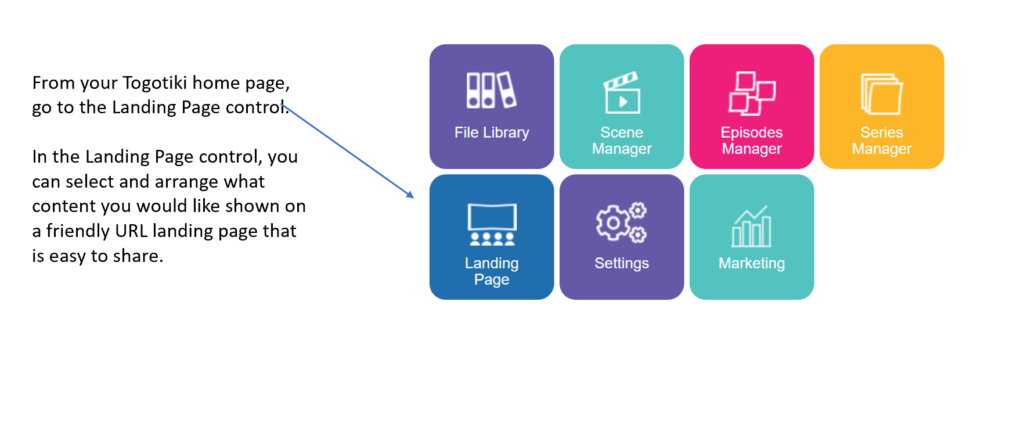
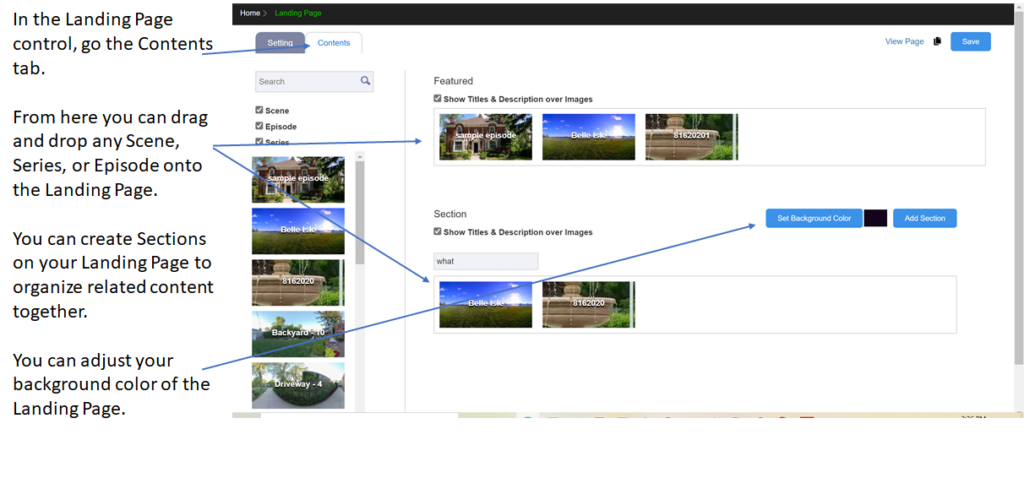
Landing Page Sharing Method You can share your virtual tour by placing in on your Togotiki Landing page. Here you can show your audience many entry points into your virtual tour making it more engaging and informative.
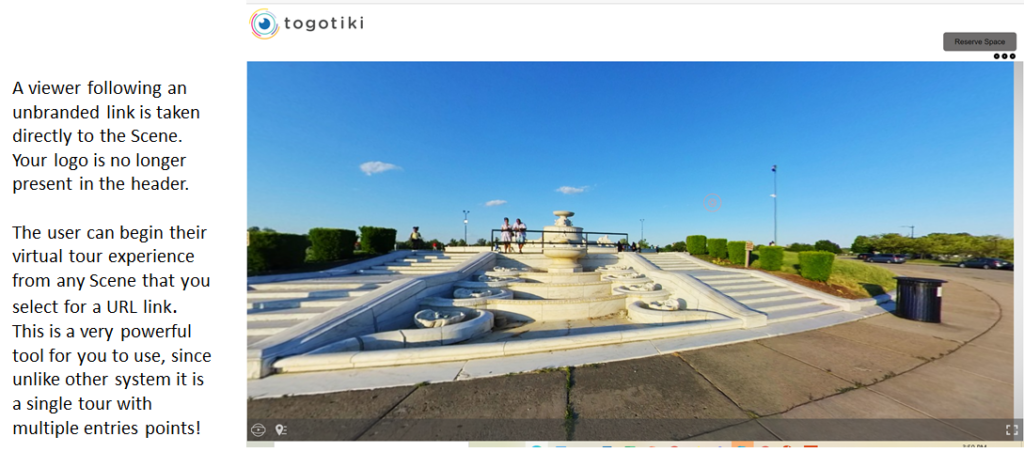
URL (hyperlink) Sharing Method You can also share your virtual tour by simply sending out one or more URL links. Every scene in your virtual tour will have its own unique URL. This helps you direct your visitors to the correct spot in any tour.